
The Guide to earning Outlast 2 'Messiah' Trophy
- jnyeyourgameguide
- Aug 13, 2023
- 11 min read

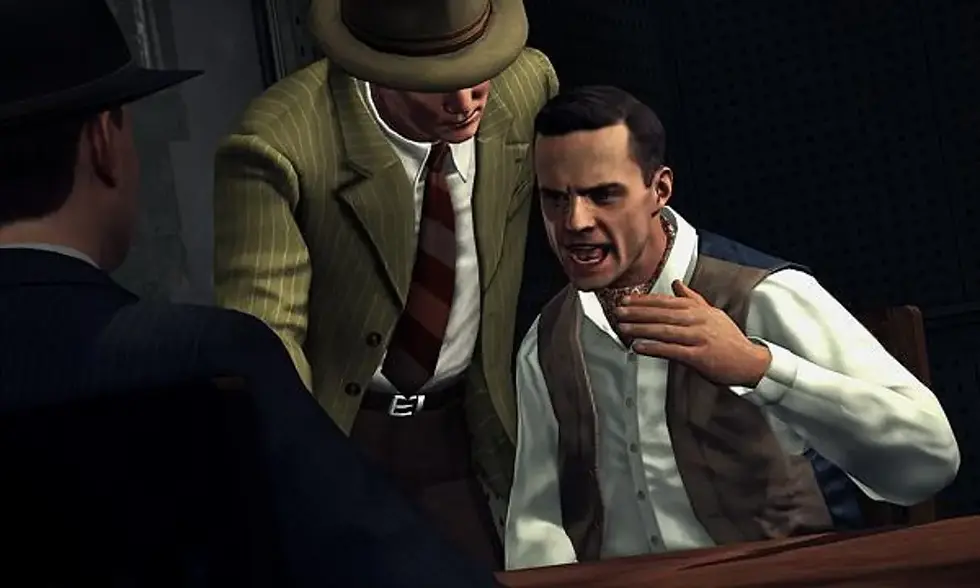
Outlast 2 is the follow up to 2013's hit horror classic Outlast, and builds on the first game with improved graphics, larger scale and more involved story. It tells the tale of Blake Langerman searching for his pregnant wife, and fending off the locales as they believe her to be some kind of prophet. The trophy we are attempting is to complete this game on the hardest difficult (Insane) the hardest difficulty with one life so no room for mistakes. We only have one battery to last us the whole game too.
Strap yourselves in for the bumpy ride ahead. We’ve got plenty of people who want us dead. We’ve got the religious cultists and their large lady enforcer, the other religious cultists with a large lady enforcer and Laird who looks like he’s out of Mortal Kombat. Not to make matters worse, but you and everyone else around you is slowly being driven insane by the strange radio signals and large flashes of light that Murkoff, the seedy insidious company from the first game, are emitting. That means that every so often you take a short but sweet trip to dreamland. But it’s not so much a dream, more a nightmare that you’re back in school being chased by a supernatural tongue being. What I wouldn’t give for my typical school nightmares where I just forgot my homework, not fighting for my life. Oh and you’ve only got one life to dodge all this danger or it’s all the way back to the very beginning. Still interested? Perfect, let’s get started!
So now we know what we’re up against, what do we have at our disposal to try and survive this torture? So we’ve got our trusty handheld camera with a night vision and microphone settings to navigate the darkness and sounds. Although… part of the challenge we are preparing for involves us beating the entirety of this 6 hour game without reloading a battery. This means we have to use this one battery very sparingly, almost not at all until the end of the game where large sections are in complete darkness underground. But maybe we can use the first aid in the game, to heal from enemy attacks to save our life so we can keep going. Sadly not. Most of the generic enemies are a consistent two hit kill, but the boss enemies are an instant kill, which doesn't leave much room for first aid and often won’t be used. So is there anything we can use? Yes. Knowledge, and that’s where I come in!
I can understand on the offset how this could look very difficult and frustrating. But I have managed to do it and I’m not by any means the best gamer of all time so I have every confidence that you can do it. What any permadeath run requires is a lot of practice and a general familiarity with the game. I think all in all I ended up playing the game over 7 times from start to finish, with multiple failed attempts until I finally managed it. My advice for honing your strategies to find consistent ways to overcome enemy encounters would be playing the game on a lower difficulty. Nightmare difficulty is the exact same level of difficulty, but you can reload the checkpoint in order to rinse and repeat until you’re comfortable. As well as this, on one of my original playthroughs I jotted down certain points in the game where I either got lost or died in an enemy encounter so you can return to it later or look it up on the internet. Another general point of advice would be to increase the brightness exponentially in the in game settings menu as well as your actual monitor. This is so you can better see some outlines of doors and structures in the environment to better navigate the many moments where you are thrust in the pitch black. Ultimately, try not to get disheartened if you are struggling with the game, it is difficult, unforgiving and sometimes just entirely unfair. You should ultimately try this level of challenge if you enjoy the game, as if you don’t you’ll only end up getting fed up.
Moving onto the actual guide itself, it is grouped in chronological order, so the advice runs parallel to the events of the game. I’ve done my best to try and organise the tips in terms of separate instances, navigating dark areas, boss and general enemy encounters, and puzzle and general swiftness of gameplay. I haven’t mapped every single encounter that anyone could possibly struggle with, but I believe I have hit the hardest areas that most players will struggle with. Finally, best of luck and I hope this guide is helpful!
Gameplay:
After the helicopter crash and finding the mutilated pilot, look towards your right and move through the valley to the next area.
After vaulting through the crow window and unlocking the door, run straight forward into the next building going the entire way through.
1st Marta Sighting → You will know she is spawned once you hear her sound cue, after you move past the cart on your right will spawn her directly in front of her. You can dupe her by running around the shed just behind you. The chase will end once you reach the barn door and crawl under.
After the microphone tutorial, open the door and proceed left at the first house you see, and keep running until you have the bright flash of light that indicates you’re safe.
The key you need is on the first wall to your left once you enter the cage room.
After comforting Lynn you automatically bring up your camera with night vision (wtf?) Let’s get that turned off.
After you get your face licked (I know, very weird) move to the far right as quick as possible and wait for the enemy with the flashlight to move on. Stick closely to the right before emerging from the water to the far door to trigger the next scene.
The school room you spawn in will be very dark. Don’t worry you’re not in any danger, look for the dim outline of a door that is forward and right of where you start.
After crouching into the cornfield you will have enemies to avoid. As tempting as it might be, do not run. Move slightly to the right and continue moving forward until you reach a path with a climbable ledge.
After opening the barn door there will be two enemies to contend with. Move around to the right and hide in the crouchable space. Wait until he checks where you originally entered from, and wait until both enemies have vacated the area. Then push the cart so you can mantle and climb the ladder.
After the next Morphogenic Flash, you will mantle some rocks and slide into another pitch black area. Walk continuously until you no longer hear your own footsteps, then use the crawl space below you.
In the corridor of branches, you will reach a darkened hall, keep moving forward and right until you exit the area.
In the house where you enter a crawl space under the stairs, walk up the next set of stairs, staying close to the right. Ascend the next set across from the last.
The Small Town: You are safe until you reach the burning effigy near the generator. You’ll want to ensure you have enough energy to sprint when you reach the effigy. An enemy will spawn from the house directly to your right, but he won’t clock you if you sprint fast enough past him. Once you pass this point at the top of the short incline you will see a well lit small set of stairs. Be wary, as an enemy will exit through this door, hide in the nearby barrel to the right until the enemy visibly walks out of sight.
2nd Marta Sighting → She will spawn directly ahead of you as you run back to the elevator, let her chase you back to the effigy, and take the alternative path down the small set of stairs and double back on yourself to the generator.
After you are quite literally sucked down the well, crawl straight forward until you stop, then look and crawl to your right until your progress is stopped again, then left and a final left.
In the next school segment, proceed down the dark corridor until the locker with the music box opens. Again be wary that your night vision will pop up again.
After the real world chase, you will want to hide under the bed as the enemy knocks the door down, wait for him to investigate and lose interest. What I suggest doing for the next enemy interaction is difficult. So walk down the stairs and creak open the next door, wait until they are aggravated. Dupe the enemy in the small adjacent area, then run into the next room and lock the door behind you. Then immediately start shifting the bookcase just enough to run through to safety.
In the bookcase passage, keep moving forward whilst drifting to the right.
After the shimmy gap, ascend the house stairs and the door you need is ahead of you to the right.
In the dark room where the villagers rediscover you, the stairs are on the far back left, but you can only reach them via the path closest to the window.
After escaping through the tiny window, move into the next room and into the dark corridor which has stairs to the right at the end.
Marta Sighting 3: This is another run ender, as Marta can act very untypically. Push the cart until you hear her voice prompt, she will appear ahead of you. You will want to retreat to the small crack in the fence behind you. She will then do one of two things, she will either run around the far side and come from behind you, or break down the fence in front of you to attack you. She will eventually break the fence down in front of you, but you can keep sliding through the crack until she takes the long way round. When you see her take the long way round, slide under to push the cart as much as you feel comfortable, and rinse and repeat until you reach the gate.
2nd Corfield → Run directly straight through, don’t worry about the flashlights.
Crank Section: As long as you run straight back to the stationary wheel where you crawl you should be safe. Turn left as you exit through the door.
Marta Sighting 4: Once you slide past the cow of safety, moving right will show two pathways. Move left slowly as Marta will spawn, and then retreat to the adjoining pathway until Marta is clear of the first.
In the school, proceed down the corridor to the right and examine the lit projector to open a door to the left back at the start. The transparency needed for the projector is in the second room on the left.
The Loutermilch jumpscare cannot be triggered without night vision, after trying the exit door and door you came through a few times (and the music has died down) activate night vision and turn around.
After climbing into a pitch black vent crawl forward. It is scripted that you will be grabbed, be sure to manually turn off your night vision.
After you drop down from the tree again, night vision will automatically turn on.
Laird Sighting 1: After being thrown off the cliff, he appears in the bushes directly ahead of you. You can notice him by the flash of his torchlight. Move forward until you see the flash of light, then run back to two close slim trees, and use the larger oak to block the arrows sent at you. Wait until they start moving round to flank you, and rush forward to where they originated and shimmy to safety.
School scene: Follow Jess, then access her computer to progress through the bathroom door.
Scaled Settlement 1: After your own personal crucifixion, wait until you regain your bearings before moving into the next area. If not obvious, ensure to stay crouched and quiet while in this area. Wait for the first enemy to pass, and move around the campfire to the right, mind out for the enemy sleeping by it and grab the bandage from the tent. After this, go left and around the back of the tent to mantle the rocks and continue.
Laird Sighting 2: Simply hide under the water for as long as physically possible. Use the subtitles and the glow of his torch fading to determine when it is safe.
Loutermilch Encounter 1: As he spawns, you are able to tell by the distortion and music cue, run back to where you originally spawned and wait for the save icon until you return to the school dining hall.
Loutermilch Encounter 2: After the phone call, Loutermilch will spawn in the bathroom. Retreat back to the locker you entered the scene in.
Laird Sighting 3: Immediately as you leave the school scene, open the door and carefully escape through the window behind you. Then move carefully around to the far right and then forward to the escaping ledge. Be mindful that Laird from the bushes will be hailing arrows at you, and that they are an instant kill.
Laird Sighting 4 and 5: After climbing over the tree, Laird will continue the assault of arrows. In the first section crawl as far as you can, and then sprint to the next rock. In the following section sprint the entire way and don’t stop.
Scaled Settlement 2: Watch out for the unwell gentlemen who springs out at you, make sure to waggle the right stick to break free and stay alive.
Scaled Settlement 3: Be mindful of the scaled running and crawling through the long grass. This takes place after you have been buried alive.
Rope Town: You shouldn’t run into any problems obtaining the rope immediately, it is up the hill at the end of the small town. After picking it up, sprint the whole way back, which is forward, left at the building and then keep straight on. Make sure you maintain a good distance away from Laird.
Loutermilch Encounter 3: On the third set of stairs, Loutermilch appears, you’ll be able to notice him by the weird vein designs on the floor. Simply rush back up the sets of stairs until this distortion stops.
When walking down the ladder, look left to the light.
After Jess' hanging, rotate on the spot until you find the outside opening.
Loutermilch Encounter 4: Again, another reminder to switch off your night vision. After being swallowed into the pool, use your night vision sparingly to reach the ledge of the pool to jump up and escape Loutermilch.
Loutermilch Encounter 5: After ascending the stairs to the second floor Loutermilch will be to your left, so bank right.
After crossing the beam of hooks, you enter a darkened room, cling to the left wall and move forward, when you no longer can move, shift to the right and find the door.
Loutermilch Encounter 6: He will appear at the bottom of the glossy stairs, simply retreat back through the door you arrived in.
Heretics Encounter 1: After walking through the slim gap, crawl into the crawl space until the heretic spawns, then retreat into the barrel by the locked door. Wait until the second heretic breaks down the door, and slip past him after he comes out.
Loutermilch Encounter 6: Once you enter the library you will see Loutermilch ahead of you but this merely an apparition. When navigating the library it is in complete darkness, so either use a video or through practice to navigate it. Just before the end of this maze, Loutermilch will appear. Simply retrace your steps back to the start and he will throw off the chase.
Loutermilch Encounter 7 → After you run down the well lit corridor Loutermilch appears at the end, run immediately back and veer left (along with Jessica) behind the bookcase to shimmy.
Loutermilch Encounter 8 → Immediately after cradling Jessica, run through the door behind you and into the corridor until you reach the bathroom on your right. Close the door behind you and hide in one of the stalls, until you see the blotches on the floor creeping over, then crawl two stalls over and run through the open door.
In the next pitch black corridor, go left.
Heretics Sighting 2 → After hiding from the enemy that jumps down from the ceiling, you will meet another heretic in the same corridor, run back to the room you started in and wait to use the gap. Upon entering the gap, wait for the second heretic to make potentially two rounds (retreating back to the gap when you feel threatened) and running down the empty corridor.
Turning off the power: When looking directly at the sparking lights, one of the switches is directly to the left, with the second through the passage directly behind it (where Val spawns) If you get lost due to low visibility, look up at the wires to guide your way, and hide in the water when you see Val’s flame.
When in the water, swim for the candles furthest away from you.
After cradling Jessica, turn around and run down the dark cavern, keeping to the right, and then a sharp left at the rubble.


Comments